
Low-Fidelity Prototype Template
Turn high-level design concepts into testable artifacts.
About the Low-Fidelity Prototype Template
You can use a low-fidelity prototype to create an early vision of your product or service. Using a template to create that prototype makes the process simple.
What is the low-fidelity prototype template?
Our low-fidelity prototype template helps teams study the functionality of their product or service. The template focuses on sketching and mapping out content, menus, and user flows to inform future designs. It allows both designers and non-designers to participate in the design and ideation process. Instead of producing linked interactive screens, our low-fidelity prototype template focuses on insights about user needs, designer vision, and alignment of stakeholder goals. Looking for a wireframe template that can be used as a blueprint for web pages or app screens? Take a look at our low-fidelity wireframe.
What is a low-fidelity prototype?
A low-fidelity prototype is a practical and early vision of your product or service. These simple prototypes share only a few features with the final product. For example, let’s say you’re designing an app. The low-fidelity prototype will provide an outline of where things will go and how it will function for users. The specific details and product development process come later. For this reason, low-fidelity prototypes are best for testing broad concepts and validating ideas. Low-fidelity prototypes are also static and tend to be presented as individual screen layouts. Each screen looks like a sketch or wireframe, with simple black-and-white illustrations. Instead of intricate details, each frame is filled with dummy content or labels, depending on what’s available.
How to create a low-fidelity prototype
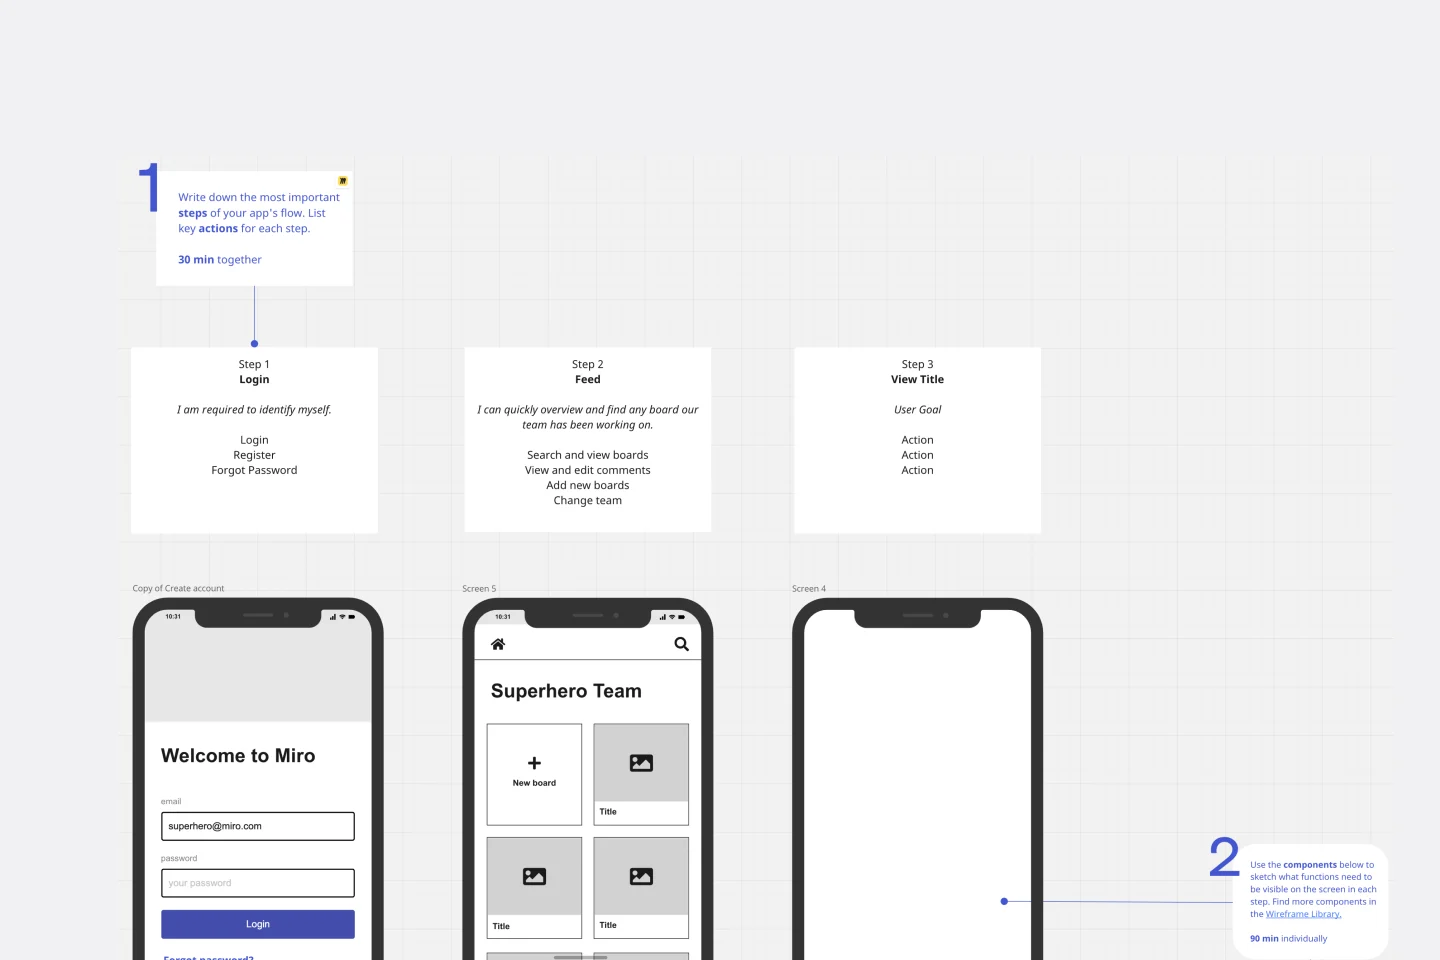
Making your own low-fidelity prototypes is easy with Miro. It’s the perfect canvas to create and share your prototypes with colleagues and stakeholders. Start by selecting our low-fidelity prototype template, then take the following steps to make your own.
1. Figure out your goals. First, you need to identify what your goals and objectives are. For example, your goal might be to identify the core features of your product. On a sticky note, you can list two or three core functionalities you plan to include in the low-fidelity prototype. This will help you keep your goals in mind as you progress. You can use our stickies packs template to help with this.
2. Define your method based on your user and resources. The level of detail you include in your low-fidelity prototype will depend on the answers to three questions:
What type of user will be exposed to this prototype?
How can they deliver useful feedback?
What tools and resources are accessible to you?
Once you understand your resources, who your users are, and how you’ll gain feedback, you can start to create your prototype.
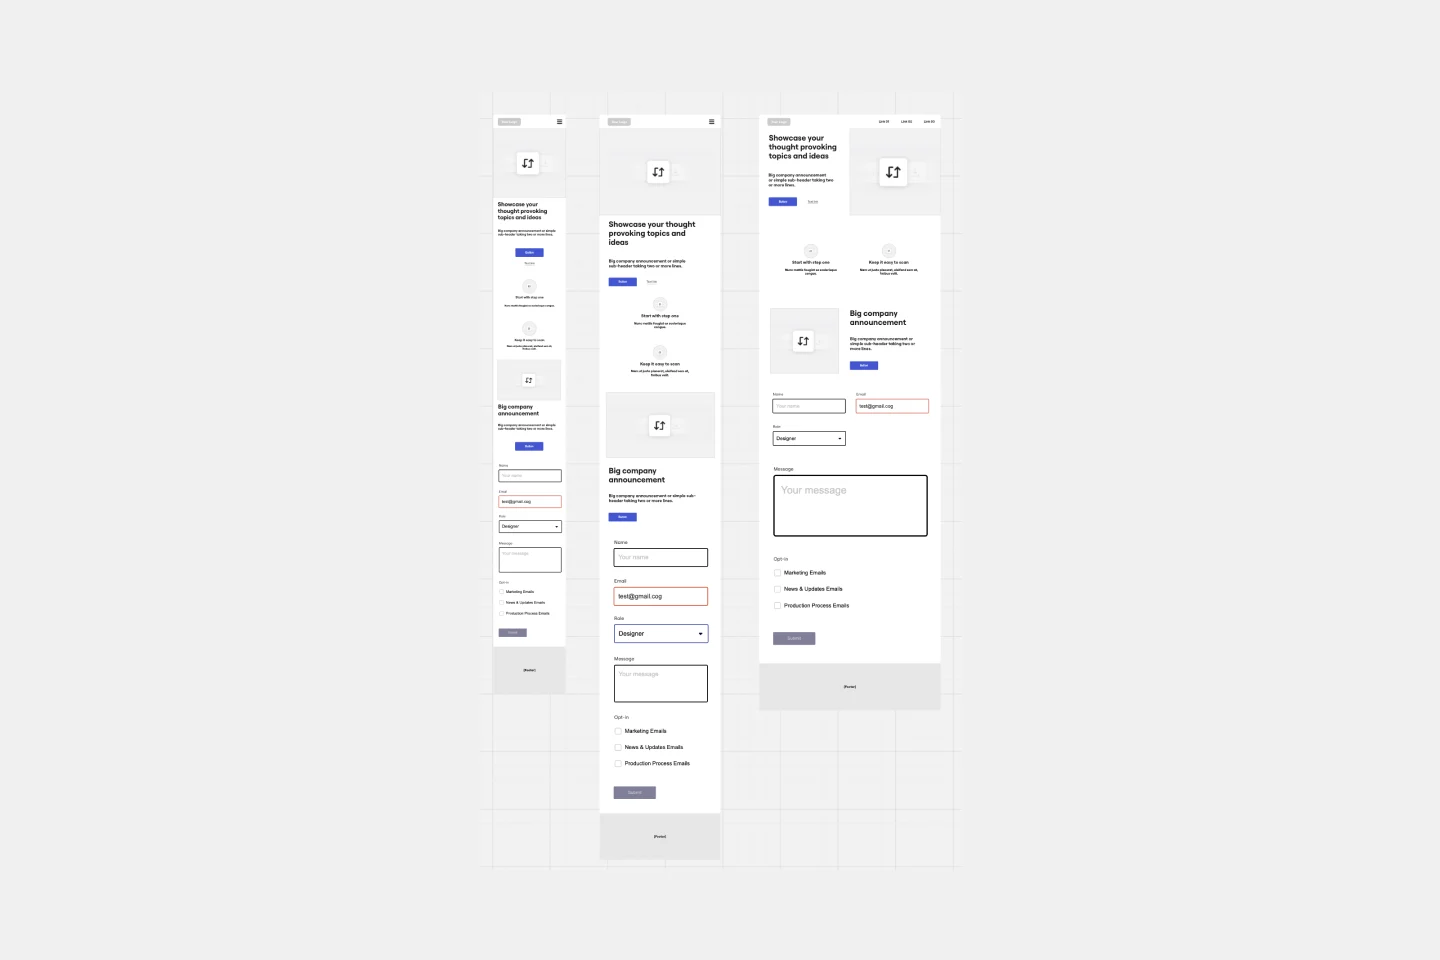
3. Create your prototype. Use Miro’s template to create your prototype. It’s easy to use, and you can customize it to suit your needs. If you work in Adobe XD, you can also use the Adobe XD plugin to add your artboards to Miro and collaborate with your team throughout the design process.
4. Execute your prototype. You’ve chosen the template — now it’s time to bring your prototype to life. At this stage, don’t worry so much about form or function. Stick to the focus of your idea and what you want to test with the user.
5. Test your prototype. Time to put your prototype to the test. Start by helping your users understand the aim of your prototype project and ask probing questions. You can also draft a short welcome screen or guide alongside the prototype wireframes for users to read. You can solicit general feedback and note their reactions, awareness, points of competitive advantage, and intention of use.
6. Learn from your prototype testing phase and repeat. Collect user feedback and find the commonalities among their observations. These insights can be built into an affinity diagram to spot patterns or similarities. You can repeat the testing phase with users as needed. Once you’ve incorporated user feedback into your low-fidelity prototypes, you can then move on to building a high-fidelity prototype.
When should I use a low-fidelity prototype?
Low-fidelity prototyping is becoming more popular because of the rise in design thinking and lean start-up methodologies. This includes early validation and minimum viable product solutions that teams iterate on. Not to mention the increase in the collaborative and responsive approach of user-centered design. But when exactly should you use a low-fidelity prototype?
Low-fidelity prototypes are most useful when you need to test each visual design element. From workflows and conversion paths to the placement of visual elements and website engagement, a low-fi prototype will help you break down complex processes so you can test how it works.
Product managers and UX designers can use low-fidelity prototypes when they need to:
Make design changes. It’s much easier to make changes during the low-fi product testing phase than further down the design process.
Get honest feedback. Low-fi prototypes encourage users to give honest and meaningful feedback based on functionality, not the way it looks.
Set expectations. Use low-fi prototypes to set realistic expectations with stakeholders. The sketches are basic in their design, so stakeholders know they’re unlikely to ship the next day.
What can you learn from a low-fidelity prototype?
A low-fi prototype is helpful during the early stages of the design process. It’s very top-level, giving UX and design teams a chance to focus on the core functionalities without getting distracted by other features. It’s an important step to take before getting into more detail with hi-fi prototypes.
Here’s what you’ll learn when you create a low-fidelity prototype:
See how your functionalities work. Check and test functionality before focusing on the visual side of things and additional features.
Get a better understanding of complex designs. Focus on the fundamentals of the user experience without too many distractions. It’s stripped back, so you can put all your attention towards the core functions.
Identify the areas of improvement. Easily visualize high-level designs in a simple way to better understand how they work and the improvements you can make before you develop further.
Discover more mobile app wireframe examples to create wireframes for your next big thing.
Get started with this template right now.
App Wireframe Template
Works best for:
UX Design, Wireframes
Ready to start building an app? Don’t just imagine how it will function and how users will interact with it—let a wireframe show you. Wireframing is a technique for creating a basic layout of each screen. When you wireframe, ideally early in the process, you’ll gain an understanding of what each screen will accomplish and get buy-in from important stakeholders—all before adding the design and content, which will save you time and money. And by thinking of things in terms of a user’s journey, you’ll deliver a more compelling, successful experience.

Online Sketching Template
Works best for:
UX Design, Desk Research, Design Thinking
Before you go full steam ahead with a promising idea, look at it from a high level — to know how it functions and how well it meets your goals. That’s what sketches do. This template gives you a powerful remote collaboration tool for the initial stages of prototyping, whether you’re sketching out web pages and mobile apps, designing logos, or planning events. Then you can easily share your sketch with your team, and save each stage of your sketch before changing it and building on it.
Website Wireframing Template
Works best for:
Wireframes, User Experience
Wireframing is a method for designing a website at the structural level. A wireframe is a stylized layout of a web page showcasing the interface elements on each page. Use this Wireframe Template to iterate on web pages quickly and cheaply. You can share the wireframe with clients or teammates and collaborate with stakeholders. Wireframes allow teams to get stakeholder buy-in without investing too much time or resources. They help ensure that your website’s structure and flow will meet user needs and expectations.